Showing posts with label Abbie. Show all posts

Wednesday, November 23, 2011

happy 3rd birthday


happy-3rd-birthday

Supplies – (all from Green Tangerines Kit Club September) patterned paper: Crate Paper, Fancy Pants, We R Memory Keepers; letter stickers: American Crafts, October Afternoon; word stickers: October Afternoon; chipboard flowers: Pebbles

I had fun putting this layout together using more supplies from my September Green Tangerines Kit Club. Today was the last day to (re)apply for the Sketch Support Creative Team, which of course I realized late last night! I had two of the three projects ready to go, but not this one. Fortunately I had printed the photos a couple of weeks ago, so I just had to figure out what paper/s & embellishments I was going to use. The colors of the paper I had on hand worked for me, so even though this was definitely a “last minute” layout, I’m pretty pleased!

Thursday, October 27, 2011

sketch support | mommy & abbie


(It’s one-page sketch week at Sketch Support again! To get the FREE sketch I based this layout on, head over to Sketch Support. While you’re there, check out all of the fabulous layouts by the Creative Team.
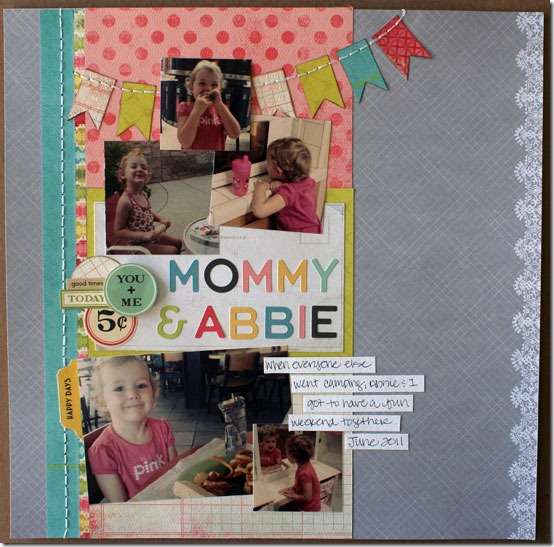
31-mommy-&-abbie

Supplies – patterned paper: My Mind’s Eye, Little Yellow Bicycle, Crate Paper, We R Memory Keepers, Fancy Pants; letter stickers & stickers: October Afternoon; postcard: unknown (in my Green Tangerine’s kit club-September: October Afternoon; other: pop dots & embroidery floss

1) This isn’t really a “change” I made, but I’m proud of myself so I’ll share:

I had this fun piece of gray paper with the lacy edge in my kit club box, begging to be used. However, I had already cut a big chunk out of one side that I’d used on a previous layout. Groan.

But then I noticed the big photo block covering a bunch of the background paper…hmmm…So I cut my gray paper in half & flipped the side with a piece cut out. Then I taped the 2 halves back together, so there is now a hole in the middle of my page. Make sense? That hole is now covered up & I was able to use the gray paper! Yay!

2) Since it’s not a birthday layout, I didn’t want to include birthday candles in my title block. I used a few circles & word stickers instead, popping up the “you + me” sticker (so perfect for this layout!). I also omitted the stitching, but the postcard embellishment I used had a light line defining the edge.

31-mommy-&-abbie-1

3) I decided to stitch my banner to my layout rather than try to string the paper. I used a ribbon scrap draped across the page to figure out where I wanted each piece of paper to go and then attached them. Then I used my Sew-Easy tool to punch holes. No pencil lines needed! Score!

31-mommy-&-abbie-2

Thursday, October 13, 2011

abbie 3

Here is the sketch I started with:

09 june basic sketch

And this is what I came up with:

41-abbie-3

Supplies – patterned paper: Stella and Rose by My Mind’s Eye, Little Yellow Bicycle; letter stickers: American Crafts; stickers: October Afternoon; chipboard: Pebbles; ink: Tsukineko; ribbon & word strips: from Green Tangerine Kit Club (September); other: staples

1) The most obvious change I made was that I did a single page layout, using the left-hand side of the sketch.

2) I used one large (8”x6”) photo in the photo block. I had this great picture of my daughter from her third birthday just asking to be scrapped, so I resized it in Photoshop Elements & converted it to black & white.

3) On the far left I used an oversized “label” that I made by tracing a template onto patterned paper. I embellished it with lots of word stickers from October Afternoon, and then added a chipboard flower to bring some pink to that area.41-abbie-2

4) I added an extra layer of paper along the top by using some fun word strips that came in my Green Tangerine’s kit club box. I liked the words together (“be yourself. be amazing.”) and it added a nice bit of white to the top to balance it out.

5) Lastly I used a few staples to help hold the ribbon in place, and also on the word strips to bring in some detail.

41-abbie-1

Thursday, July 14, 2011

abbie two, err, three?


Happy 3rd Birthday Abbie!

06 24 11_0002_edited_4x6

Around here, Abbie has affectionately become known as “Abbie too!” Since she was a baby, whenever we would ask who wanted to do something, Brandon & Olivia have always answered “me! and Abbie too!”. So the name stuck.

For the last year, we’ve joked that her name is “Abbie two”. And if asked, that’s probably the name she’ll tell you. (Not Abbie or Abigail, but “Abbietwo.” One word. Very cute!)

Now that she’s three, the big question is, is she still Abbie two, or is she now Abbie three?

And whatever you call her, she’s still the cutest little three year old in town…So Happy Birthday my dear sweet Abigail, our little Abbiechab, Abbie too, & curly Q.

Thursday, June 2, 2011

bubble blowin’


I love Monday mornings! For a long time I went to MOPS on Mondays, then as my kids got older (and my life got crazier), I stopped. At first it was really tough, but then I realized it was my only time with just ONE child! Holy Cow! So Mondays became special Abbie & me time.

I took these photos of Abbie blowing bubbles one Monday in March, and just got around to scrapping them last weekend. I used a one page sketch for Sketch Support (seen here) and stayed pretty true to the design.

I did change the size of the photos from one 3x4 & one 6x4 to two 4x4s. I couldn't get any of the photos I had of this morning to work in the 3x4 size. A very quick & easy change in PSE.

17-bubble-blowin

I broke into my May GTKC for the 2nd time with this layout. I’m really loving all the patterned papers in it! I created the curve in PSE by using the custom shape tool & drawing a flag across an 8 1/2 x 11 sheet of paper. I got the curve to the size I wanted & then printed it on a piece of scratch paper to make a template. So easy!

17-bubble-blowin-1

I swapped out the stars in the original sketch for circles (to represent bubbles). I used my 1 1/4”, 1” & 3/4” punches and then inked the edges in brown.

17-bubble-blowin-2

The letter stickers were in the kit too, from Bella Blvd. I like the font (even though the stickers weren’t laying down & sticking as well as I wanted them too!).

17-bubble-blowin-3

Wednesday, January 26, 2011

everyday abbie

When I first used this layout idea from Cathy Zielske back last fall, I knew I wanted to use it on a regular basis. What a perfect way to document all those “things” your kids do at different stages! Right now I’m thinking I’ll do this every six months so I can catch them at their birthdays & half birthdays. If nothing else, it’s an easy one page “filler”!


I finally used some Basic Grey I’d had sitting around for a couple of years…I think it’s the Bittersweet collection.  I was so thankful to have the letter stickers too!


For my journaling I just listed lots of things that Abbie does right now, and separated each thought with a “|” (key is just above my “enter” key). That way I didn’t have to use complete sentences, and if I had an extra long thought it would work too.


The flowers were in my January kit from Green Tangerines. I didn’t have a pink brad in the right color, so I punched a 3/16” circle with my Crop-o-dile, adhered it to the center of the flower, & then added Glossy Effects to give it a little oompf.

Saturday, October 30, 2010

imagine

After trying for over a week to upload photos, I finally got it to work! Yay! I guess I could try a different program, but I'm used to blogger at this point.


Anyhow, I give you a (semi) new layout (since I did it like 2 weeks ago!):

I used a bunch of leftover goodies from my Apr/May Green Tangerine's kit. I'm trying to purge a bunch of old/unused (hoarded!) scrapbook supplies right now...which is really hard when there's so much new stuff out there! But it is also such a great feeling to empty out boxes of supplies too!


Monday, October 4, 2010

two

I changed up the title again to fit my two year old:

Now I have three "everyday you" layouts, and really, none look the same? Same idea, but different.

I was able to use thickers from my stash (yay!). The patterned paper is from Jillibean Soup's Pasta Fagioli collection (more from my winning stash) and the nice border sticker is leftover from my August 2009 GT kit.

For this little embellisment, I punched out a circle of paper (more Pasta Fagioli), adhered it to a chipboard button (Cosmo Cricket), and inked the edges. It still needed something so I plunked a button on top & threaded some twine through it.


Saturday, September 11, 2010

turning two

Abbie had her second birthday almost two months ago! We had a small gathering at home since 1) most of my friends don't have kids her age and 2) of the friends who would come, most were on vacation. Which was fine with me!

I used some of my leftover My Mind's Eye papers from Olivia's birthday layout along with a Becky Higgins' sketch. I used some Thickers from my stash; I would've loved to have titled my layout "Abbie two" since she says "Abbie too" all the time! However, I named her Abbie with an "ie" not Abby with a "y". And I didn't have any black "e" sticker. I could've bought new Thickers, but I would've had to order them, and sometimes I just want to finish a layout, KWIM?

I added journaling strips on the right page, with some quick details of her "party" and what her gifts were (not much, since #3 doesn't really need anything!).

The buttons are mostly Jenni Bowlin & from my April/May Green Tangerine's kit. The colors just happened to match the papers! Yay me! I was short one button (I wanted three groups of three), so I used one of my Jillibean Cool Beans buttons.

I added this handprint of Abbie's on the page as well. I don't do it on every birthday layout, but it is a fun addition...and a free embellishment! I used her left hand since (at least right now) Abbie is left-handed. I just painted her hand with some acrylic paint & smooshed it down on white paper for her, and it only took one take! When I've done my other kids' handprints, it usually takes a couple of times!

Wednesday, June 9, 2010

girls & their makeup

I don't know about you, but my girls *LOVE* to put on make-up with me everyday. *LOVE*. Fortunately, "make-up" to them is some blistex & a naked powder brush (usually), but some days they get to have a little blush & lip gloss too. Olivia actually has quite a bit of real make-up, thanks to a generous auntie who gave her a bunch of samples for Christmas. But we reserve the real stuff for days when I know we'll be at home.


I got these cute pictures of Olivia doing Abbie's make up this past February. I took a lot & I'm so glad I did...that way I had enough to choose a few from to do a layout.

I used my March kit from Green Tangerines & a sketch from Page Maps.

Monday, May 31, 2010

love

There's nothing better than a beautiful daddy-daughter moment, is there?


I got this photo by chance one afternoon & used it in my Project Life album. I also printed another (without the date) for me to scrap.

I was inspired by this layout on the October Afternoon blog. Obviously I only used one photo, but I did get to use a fun card from the Go Fly A Kite Line instead. Everything on this layout is from the Green Tangerine's May kit.

Originally I wanted my title on the lower right of the page, like the original layout. I even put it there (thank goodness for thickers that come up easily!) but didn't like it. So I put the thickers on the card instead & I think it worked much better.

These buttons came in the kit too. I usually just adhere them with glue dots, but I thought I'd spice it up by actually stitching them on for a change. I really like how it looks.

Monday, March 29, 2010

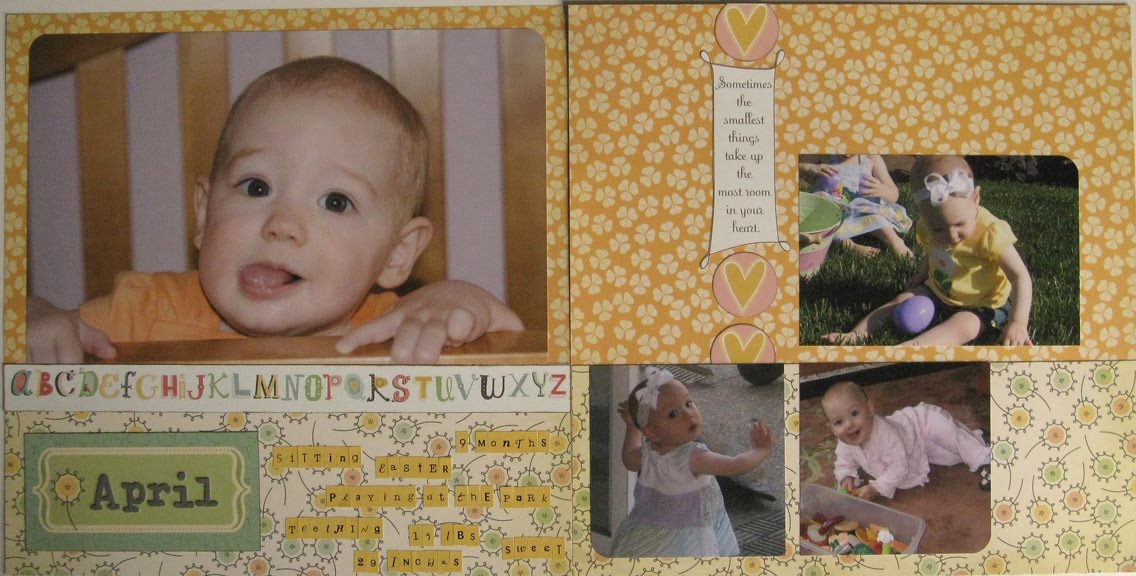
April 2009

I finally finished another layout :)

I've been working on this layout for Abbie's first year album for awhile. For whatever reason I didn't get too many "scrapbook worthy" photos last April, so it took me a bit longer to decide on a sketch for the layout. Once I picked out my sketch, I had to decide on the papers I wanted to use.

I chose paper from Cosmo Cricket's Earth Love line that I had picked up at the store a few months ago. But I only bought one of each sheet. And for this layout I wanted two of the yellow flower paper. Great. Since my local scrapbook store was closing they didn't have any more left. I could order it, but who wants to pay $5.95 shipping for one sheet of paper? So I ordered a new album too :)


The letter stickers above are from my Green Tangerines February kit. I was going to do journaling strips until I realized I didn't really have much to write about. So I used the letter stickers instead. The only bummer? Abbie was 29 1/2" (not 29) and the stickers didn't have a slash or period to make the fraction/decimal. Oh well, life goes on...

The "abc" strip is cut from the Earth Love borders sheet of paper, and the journaling block is from the Elements paper. I added the Prima letter stickers, also from my February kit.


The quote & hearts are also from the Earth Love Borders paper. It's a vertical border with the quote in the middle & the hearts on a pink background. The strip didn't work on this layout, so I punched out the hearts & inked the edges. Then I cut out the quote (those curly-Q ends were NOT fun!) & pasted it down.

Wednesday, March 17, 2010

blah blah blah NO blah blah blah NO

The oh-so-cute baby talk I overheard while Abbie (now 20 months!) was trying SO hard to close the seatbelt on her baby stroller. Fortunately, the camera was sitting right here so I was able to snap this before she noticed.

It might just end up being my POTD for Project LIFE this week...

Monday, February 15, 2010

Abbie's first birthday...finally!

Hey, it's only been seven months (unlike Olivia's 2nd birthday that was almost two YEARS ago that still hasn't been scrapped!).

Sometimes other layouts just seem more fun to do, and sometimes (for me) trying to find the "right" birthday paper can be daunting! I didn't want paper that screamed birthday, or was too baby. This paper I found at Green Tangerines last week is very summery (perfect for a July 14 birthday) and not too "birthday" at all! It's by Kaiser craft & the bonus is that it's double sided! Fun, and perfect since I made two layouts exactly the same (one for her album & one for mine). The layout was lifted from one by Laura Vegas in February's Creating Keepsakes.


Again, I photographed it outside instead of scanning it...so much better!

***ETA: the original layout had journaling strips on the left hand side, which balances it out nicely. I left those off originally, because there's really not much to say about her birthday :) However, I think I am going to add a few words (like the date, or "celebrate" or something) with white background letter stickers like Hannah & Henry from American Crafts.

Thursday, February 11, 2010

Abbie's first June (11 months old)


It feels so good to be getting caught up with Abbie's album! I only have a few more pages to go: birthday, "end of"/last page, family tree (ugh!), and April (waiting to see if I can get some more Cosmo Cricket first). Yay me :)

I used some fun Cosmo Cricket & October Afternoon on this layout, which is another fun Becky Higgins sketch. Its from last summer (I think) and I've used it three times so far! I love having a couple of large photos. I brought this with me to my last crop at Green Tangerines on Saturday night, finished it, and even took a photo of it over the weekend. And then I went to post it & realized that these photos were from June, not July...which is what I had originally title it with! Thank goodness those Thickers come off fairly easily! As Brandon would say, silly me :)

Tuesday, January 26, 2010

July

So my last layout "fit" with the weather. This layout does not :)

I finally finished the July layout for Abbie's first year album. I think I only have a couple more months to go! As long as I finish it by the time she's two, right?

As usual, I worked from a Becky Higgins sketch. This time, after I got my photos resized, I added a little text in photoshop. It saves me from having to write a lot. Which was a very good thing this time, since it took me a couple of weeks staring at this to figure out how I was going to work in my journaling!

For the layout itself, I used a bunch of goodies from my July kit. There was some October Afternoon in there, so I added some of my journaling cards of theirs that I purchased over the summer. The cool border I did was Kristen's awesome idea on one of her layouts. I love how it adds a punch of color & lots of fun patterned paper without being overwhelming. I just punched out a bunch of circles, adhered them to the edge, & then trimmed it down. Like Kristen, I added some fun dots for a little "extra".


Friday, January 8, 2010

Third time's a charm

Lately I've been having issues with Costco printing my photos--wait, let me rephrase that--I've ALWAYS had issues with Costco printing my photos. The first thing I noticed when I made the switch to Costco was that their 4x6 photos are NOT 4x6. They're a smidge off. Not a big deal when you're printing a 4x6. A very big deal when you're printing six 2x2s & two of them are 1/8" off. I've dealt with it by not printing up to the edge (which means I can't do six 2x2s, a relatively minor nusance).

More recently I've been annoyed by the cruddy color quality. Really not a new problem, but when I didn't do any photo enhancement in photoshop, I didn't mind. Now that I spend quite a bit of time editing my photos, it's frustrating to say the least! I know part of the issue is that my monitor isn't calibrated (something I need to do, like to do, but don't want to pay for!). But we're talking MAJOR off. Like super dark, and skin tones that don't look human.

Hence printing the photos for this layout no less than three times!

1) I forgot to "uncheck" the auto correct on Costco's website. Anytime you do post-processing, this should be turned off. But one would think that when pictures come out of the printer, the developer would say, wow! That cute baby looks like a corpse! Fortunately they were very understanding when I asked that they be reprinted.

2) This time I remembed to turn off autocorrect. But the photos were so dark & lacked depth. Just super blah. So I played around with the monitor settings & figured out that it was set to "super bright". That would explain why photos looked overexposed on my monitor & underexposed from the developer.

3) And take three! Hey, they're not perfect by any means! Most were taken indoors with cruddy lighting. Or outside at noon. But for the most part Abbie looks "normal".


Thursday, January 7, 2010

2 layouts in one day!

Sometimes I just get on a roll...Well, actually, I tend to print my photos in batches. So when I go to scrap them, I scrap in batches to some extent too.

This is the February layout from Abbie's first year album...less than a year to complete :) And everything was from my stash...woo-hoo! The patterned paper is all from Bo Bunny, from a layout I did of Brandon. And the letter stickers are from the Green Tangerines July Kit. I thought I was going to have to buy new thickers--oh darn ;). And while I was seeing what they had at the scrapbook store, I saw these glitter thickers & remembered I had them at home--still in the kit club box rather than with the rest of my thickers.


Sunday, January 3, 2010

January Desktop

I love having these fun desktops for my computer. And my husband even has me send them to him at work now (he says it's because he likes having the calendar...).

However...sometimes it's hard to find pictures to use! Not like I don't have enough pictures around. But since I make the January desktop on December 31, I don't have "January" photos. I have a ton of "December" photos, aka, "Christmas" photos. :) 

Note to self: next year, take random photos in December of the kids that AREN'T Christmas related. Good luck with that one!


And now that I think about it, this would be a great "photo" for today's Project Life!

Saturday, November 28, 2009

March


I have an album for each of my kids chronicling (is that a word? looks funny!) their first year. I got the idea from a Becky Higgins article in Creating Keepsakes back in like 2003. Way before kids! But I love her scrapbooking style & really liked her approach.

Each album starts with a title page (duh), then layout about their nursery, my pregnancy, our family tree (haven't done Abbie's yet), their birth, first visitors, and then one layout per month for the first year. I do an additional one for their first Christmas & also their birthday. Then on the last page I take an "end of your first year" photo on the night before their first birthday. It's a shot of their "end" :)

I like this approach to scrapbooking. It's simple and do-able.